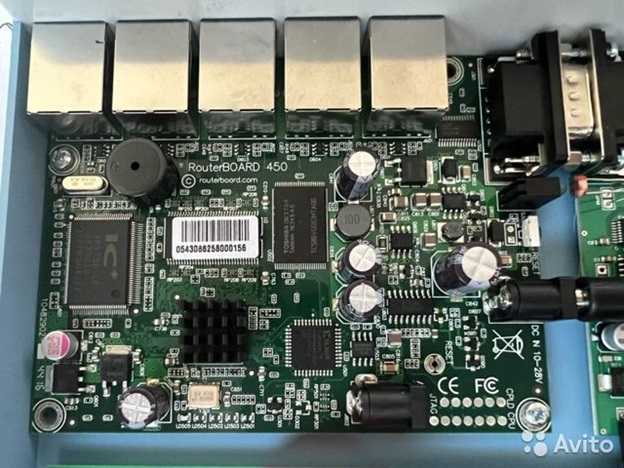
RouterOS supports serial via /ports, including serial devices via USB or actual serial ports on the device. While RouterOS allows serial to IP via /ports/remote-access, e.g.
Code: Select all
/port remote-access add port=serial0 protocol=rfc2217 tcp-port=22171Not much has changed, so this 2009 posting has more background on serial and RouterOS (viewtopic.php?p=138054&hilit=rfc2217#p138054). The new docs may have some details on new devices and serial support too.
Basically the container improves upon this approach:
https://wiki.mikrotik.com/wiki/Sending_ ... erial_port
Idea: use HTTP to "proxy" serial data via a container
Importantly, since /container does NOT have direct access to the serial ports, so you MUST use /ports/remote-access to use this container with even a directly attached serial device.
RouterOS does a /tool/fetch, but obviously that doesn't work with serial data (or the remote-access ports either)... Since a container can do whatever userland stuff (e.g. no USB/devices), I create one that has a small python script that listens for incoming HTTP request POST'ed, sends via IP-based serial port (e.g. a /port/remote-access), and then returns the response from the serial device in the HTTP response as plain text. So with the "serial2http" container, the following sends "my-data-to-go-to-serial" to a IP-wrapped serial device, and the output is available in CLI:
Code: Select all
/tool/fetch url=http://172.22.17.1 method=post http-data="my-data-to-go-to-serial" output=user... with Python's PySerial library (in container) as the "glue"
What the container below does is use Python's pySerial library to connect to any serial port exposed as IP, and runs Python's internal HTTP server to listen for commands to send. It looks for a "\n" to know when to return a response. Feel free to adjust the python to your needs – more example here really... Where/how is connected is controlled by env vars to the container:
Code: Select all
/container/envs {
    # HTTP port the container listens for commands on...
    add name="$containertag" key="PORT" value=80
    # PySerial "URL" to use to connect to serial device via RFC2217
    add name="$containertag" key="SERIALURL" value="rfc2217://172.22.17.254:22171?ign_set_control&logging=debug&timeout=3"
    # while most options can be set in the pyserial's url, BAUDRATE must be explicit
    add name="$containertag" key="BAUDRATE" value=115200
}
/container/mounts {
    # serial2http doesn't use mounts
}Not the python expert – only used it because PySerial has very rich serial support – so LMK if there are issues in the actual Python code. (e.g. It's not clear who closes the files, but seem to happen)
Building the container...
One day I'll publish some containers on GitHub, but you can build this one using the following below.. So I'll presume you have docker tools and know something about it to keep this short.
To build it you really need two files: and so download the following put them in same directory.
- Dockerfile
- serial2http-code.py
Dockerfile
Code: Select all
FROM python:3.11-alpine
WORKDIR /usr/src/app
RUN pip install --no-cache-dir 'pyserial>=3.5'
COPY . .
CMD [ "python", "./serial2http-code.py" ]
Code: Select all
#!/usr/bin/env python3
import serial
import io
import os
from http.server import BaseHTTPRequestHandler

defserialurl= "rfc2217://172.22.17.254:22171?ign_set_control&logging=debug&timeout=3"
httpport    = os.getenv('PORT', "80")
serialurl   = os.getenv('SERIALURL', defserialurl)
baudrate    = os.getenv('BAUDRATE', "115200")
print(f'port {httpport} serialurl {serialurl} baudrate {baudrate}', flush=True)

class SerialViaHttpPostHandler(BaseHTTPRequestHandler):
    def do_POST(self):
        # use ENV variables – TODO should use some config class...
        global httpport
        global defserialurl
        global serialurl
        global baudrate

        length = int(self.headers.get('content-length'))
        reqdata = self.rfile.read(length)

        self.send_response(200)
        self.send_header('Content-Type', f'text/plain; charset=windows-1252')
        self.end_headers()

        with serial.serial_for_url(serialurl, baudrate=int(baudrate), timeout=5) as ser:
            try:
                cmdin = reqdata
                print(f"cmdin = {str(cmdin)}({type(cmdin)})", flush=True)
                ser.write(cmdin)
                cmdout = ser.readline()
                print(f"cmdout = {str(cmdout)}({type(cmdout)})", flush=True)
                self.wfile.write(cmdout)
            finally:
                print("finished", flush=True)
                ser.close()

# when launched as root script, start listening on HTTP
if __name__ == '__main__':
    from http.server import HTTPServer
    server = HTTPServer(('0.0.0.0', int(httpport)), SerialViaHttpPostHandler)
    print(f'HTTP listening on {str(httpport)}')
    server.serve_forever()
To build it, you can use following command, in the same directory as the two files above:
Code: Select all
docker build --platform linux/arm/v7 -t serial2http .
docker save serial2http > ../serial2http.tar
The default networking assumes the following, but change as desired:
Code: Select all
{
:local containernum 1
:local containername "serial2http"
:local containeripbase "172.22.17"
:local containerprefix "24"
:local containergw "$(containeripbase).254"
:local containerip "$(containeripbase).1"
:local containertag "$(containername)$(containernum)"
:local containerethname "veth-$(containertag)"

/interface/veth {
    remove [find comment~"$containertag"]
    :local veth [add name="$containerethname" address="$(containerip)/$(containerprefix)" gateway=$containergw comment="#$containertag"]
    :put "added VETH - $containerethname address=$(containerip)/$(containerprefix) gateway=$containergw "
}
/ip/address {
    remove [find comment~"$containertag"]
    :local ipaddr [add interface="$containerethname" address="$(containergw)/$(containerprefix)" comment="#$containertag"]
    :put "added IP address=$(containergw)/$(containerprefix) interface=$containerethname"
}
/container/envs {
    remove [find name="$containertag"]
    add name="$containertag" key="PORT" value=80
    add name="$containertag" key="SERIALURL" value="rfc2217://$(containergw):2217$(containernum)?ign_set_control&logging=debug&timeout=3"
    add name="$containertag" key="BAUDRATE" value=115200
}
/container/mounts {
    # serial2http doesn't use mounts
    remove [find comment~"$containertag"]
}
}
Anyway this approach seems to work, thought I'd share. No warranties however.


